










Send Us A Message
How to set cure time on a vulcanizing press using rheometer data
Set cure time on a vulcanizing press from a validated relationship between rheometer results and the temperature history inside the molded part—not by copying the rheometer’s t90 into the timer. The rheometer tests a small specimen at a controlled temperature; a production molding must heat through its thickness before its slowest-curing region reaches the required cure state.
Use t90 as a laboratory reference, measure how the actual molding heats, and confirm the resulting cycle through product testing. The approved setting must cure the coldest critical region without exposing hotter regions to unacceptable overcure or reversion.
Read the cure curve before choosing a time
A rheometer report is useful only when its compound identification, test temperature, test method, and test duration match the process being evaluated. Results from different instrument types or test conditions should not be treated as interchangeable without establishing a correlation.
t90 does not mean that 90% of every chemical reaction is complete, or that the finished product has reached 90% of every required property. It is a torque-based index. Tensile strength, compression set, adhesion, and fatigue performance may require different cure conditions. The acceptance target must come from the product specification and compound qualification.
Check how the laboratory defines MH when the curve keeps rising or shows reversion. Changing the test duration can change the reported reference torque and therefore the calculated t90.
Match the laboratory reference to actual molding conditions
Start with rheometer data at or near the intended molding temperature. If the report is at 160°C but the mold operates at 150°C, the reported t90 cannot be transferred directly. Obtain additional rheometer tests or use a temperature-cure relationship already validated for that compound. A rule such as “add a fixed percentage for every degree” is not a reliable substitute.
The controller display is also not proof of rubber temperature. Platen temperature, cavity surface temperature, and the temperature at the center of a thick section can differ. Inserts, uneven section thickness, preform temperature, mold loading, and heating-system performance all affect that difference.
During process development, use suitably installed thermocouples in sacrificial moldings or an approved instrumented trial. Identify the slowest-heating critical location rather than assuming it is always the geometric center. Metal inserts can alter local heat flow, and different cavities may reach temperature at different rates.
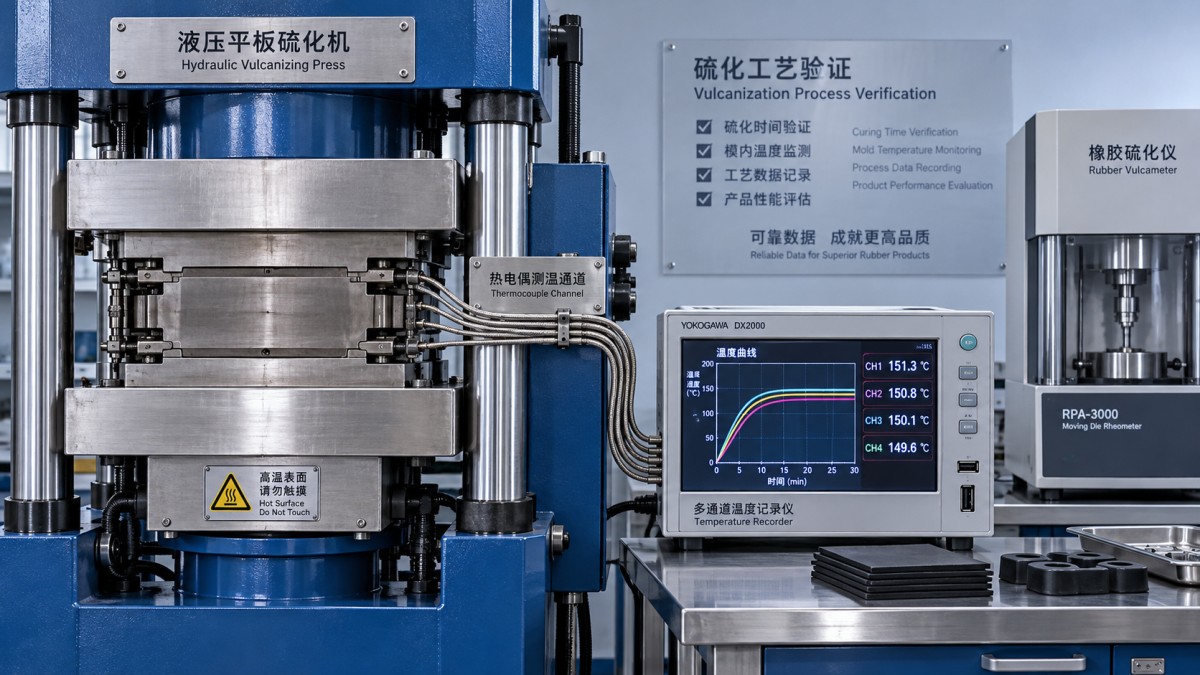
Record the temperature trace against the actual cycle events: loading, closing, venting, pressure establishment, timer start, and opening. Check the press control logic. A timer that starts at initial closure does not represent the same thermal exposure as one that starts after venting and full pressure.
Instrumentation must not interfere with mold closure, sealing, guarding, or pressure containment. Use approved sensor routes and follow isolation procedures when installing equipment; never bypass an interlock to collect a temperature reading.
Translate heat-up behavior into a trial setting
A practical development approach is to separate the cycle into heat-up and effective curing exposure. Rubber starts curing during heat-up, so these are not completely independent stages. Simply adding the entire heat-up time to t90 can overestimate the necessary cycle.
Where no validated non-isothermal cure model exists, an engineering-approved screening trial can use the measured time for the critical location to approach the reference temperature, followed by a reference-temperature hold. This is a trial basis, not a production formula. Review the cure curve first: a long hold may damage hotter regions of a reversion-sensitive compound.
For illustration, suppose a compound has a t90 of six minutes at 160°C, and an instrumented molding reaches the approved near-160°C band at its critical location four minutes after the timer starts. A ten-minute timed trial represents a four-minute heat-up allowance plus a six-minute hold. It does not establish that ten minutes is necessary or acceptable: curing has already occurred during heat-up, and the surface has received more heat than the center.
A more accurate approach uses the measured temperature history with a compound-specific cure model. One simplified method expresses exposure as equivalent time at a reference temperature:
Equivalent cure time = ∫ aT[T(t)] dt
Here, aT is a validated relative cure-rate factor, equal to one at the reference temperature. This method requires data over the relevant temperature range. It should not be assumed to predict induction behavior, changing reaction kinetics, or reversion unless those effects are included and validated. A generic activation energy borrowed from another compound is not a sound basis for shortening a production cycle.
Validate the shortest acceptable cycle, not just demolding quality
A molding that releases cleanly and feels firm can still have an undercured interior. Establish acceptance criteria before varying the timer, then compare controlled trial cycles while holding mold temperature, pressure, charge preparation, and loading practice constant.
The validation should address the properties that determine service performance:
- Internal cure condition: examine critical thick sections using an approved assessment method.
- Specified physical properties: test hardness, tensile properties, compression set, adhesion, or other requirements relevant to the product.
- Dimensional and visual quality: check shrinkage, distortion, blisters, surface defects, and demolding damage.
- Excessive heat exposure: investigate property deterioration at longer cycles, especially where the rheometer shows reversion.
Use repeat trials and the approved sampling plan, including relevant cavity positions and operating conditions. Select a production window with enough margin for demonstrated variation rather than setting the timer exactly at a single passing result. If post-curing is specified, keep it controlled during comparison; it must not become an unapproved remedy for inadequate press curing.
Keep material variation separate from timer adjustment
When a previously stable cycle stops producing acceptable parts, extending the timer should not be the automatic response. Compare the current batch’s rheometer curve with the qualified reference, then check material storage, preform temperature, charge weight, mold heating, sensor condition, and press sequencing.
Upstream mixing consistency matters here. Changes in discharge temperature, curative addition, cooling, or dispersion during processing in a kneader can affect the compound delivered to the press. A molding-time adjustment cannot reliably compensate for an unidentified material change.
Likewise, added time will not correct trapped air, inadequate cavity filling, poor venting, or insufficient molding pressure. Confirm the defect mechanism before changing the approved cure recipe.
Make the approved setting reproducible
The production instruction should record more than a timer value. Include the compound and mold identification, applicable rheometer conditions, mold-temperature limits, pressure requirement, venting sequence, timer-start event, preform condition, and any specified post-cure. Define the response to interrupted cycles and temperature excursions.
Startup after a cold mold or prolonged stoppage deserves a separate release check because thermal equilibrium may differ from steady production. Follow approved warm-up and first-piece procedures rather than compensating with an improvised time extension.
A defensible cure-time setting has a traceable basis: a laboratory cure reference, a measured molding temperature history, and passing product results across the approved operating window. Keep those linked when changing compounds, section thickness, tooling, heating conditions, or cycle sequencing; an unchanged t90 alone does not prove that the existing press time remains valid.